Promote your indie comic where readers go to browse.
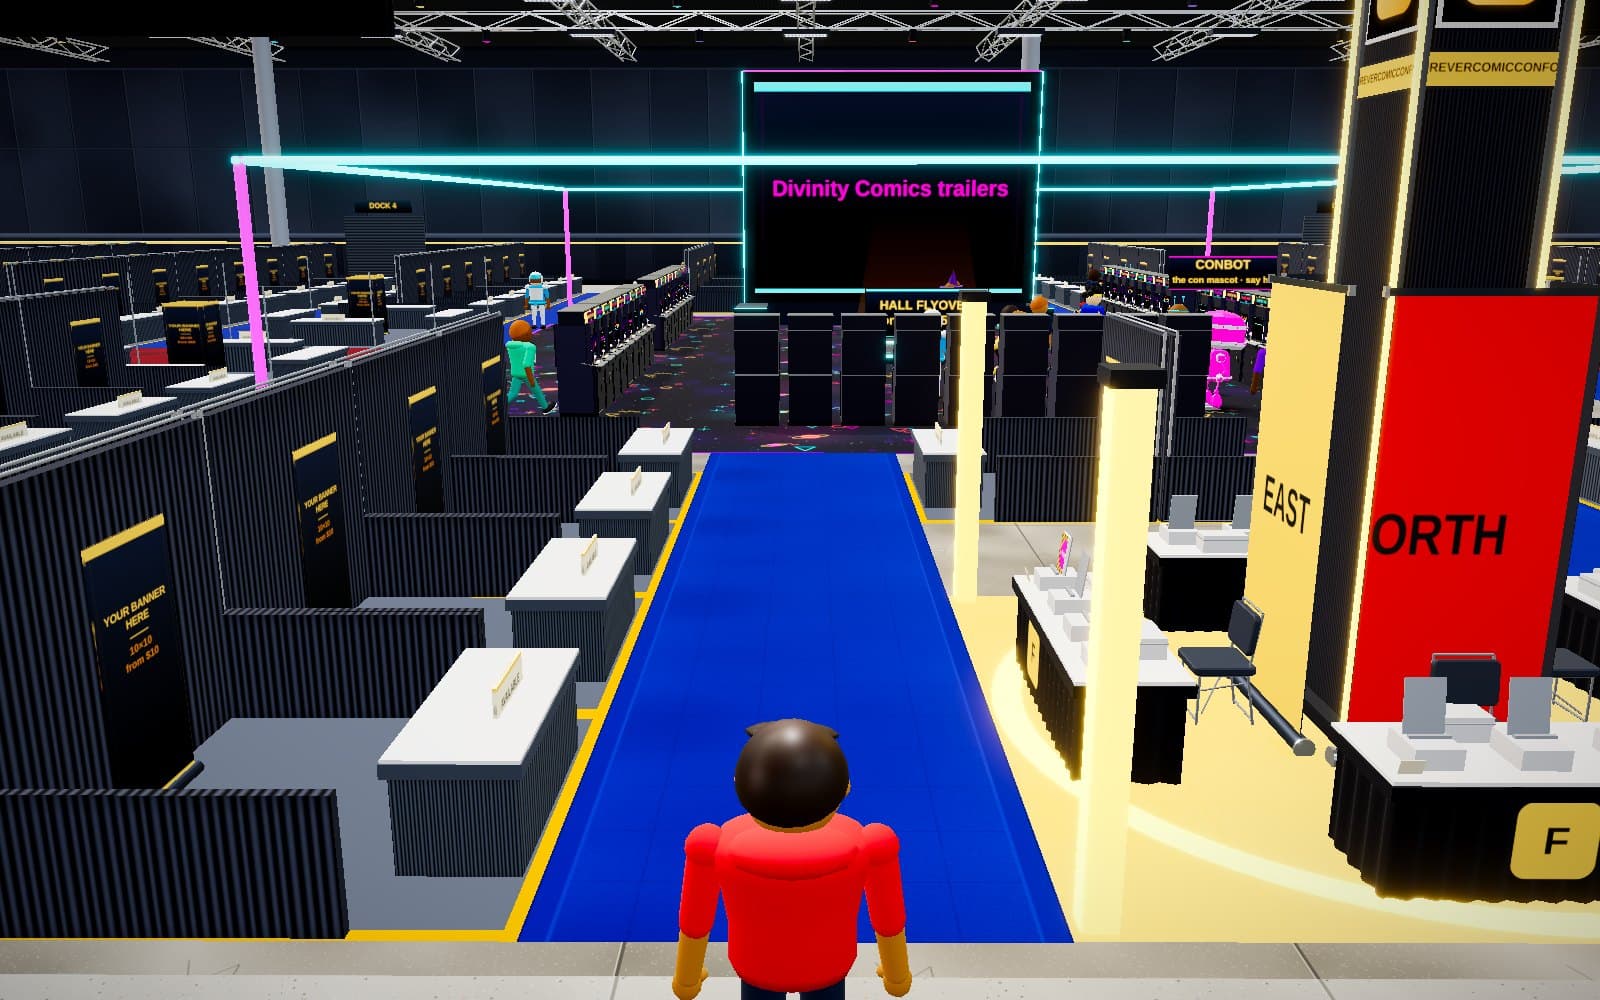
Social feeds reward whoever posts most. Conventions reward whoever's there. ForeverComicCon is a convention that's always on: readers walk the floor looking for something new, and a booth puts your book in their path. Here is the whole thing, from nothing to a booth with your cover on the table and a link to your campaign, with a picture of every screen.
Step-by-step guide with pictures ↓ · 11 steps · Fifteen minutes, start to finish.
How to do it, screen by screen.
Written for someone who has never used the site. Every step says exactly what to press and shows what you will see. Fifteen minutes, start to finish.
Have ready before you start
- An email address and a card. A table is $5, a 10×10 booth from $10. (Or a booth code.)
- The one link you want readers to hit: your Kickstarter, Webtoon, Tapas, Patreon, store or newsletter.
- Your cover as a picture, 600 × 900 px, and a tall version of your key art for the banner (1200 × 2400 px).
Step 1: Open the site and press the yellow button
Go to forevercomiccon.com. The big yellow button under the headline says Get a booth from $5. Press it.
The 3D hall opens in the same tab. The first time it loads you will see "Opening the hall" for a few seconds while the floor and the models download. Nothing to install.
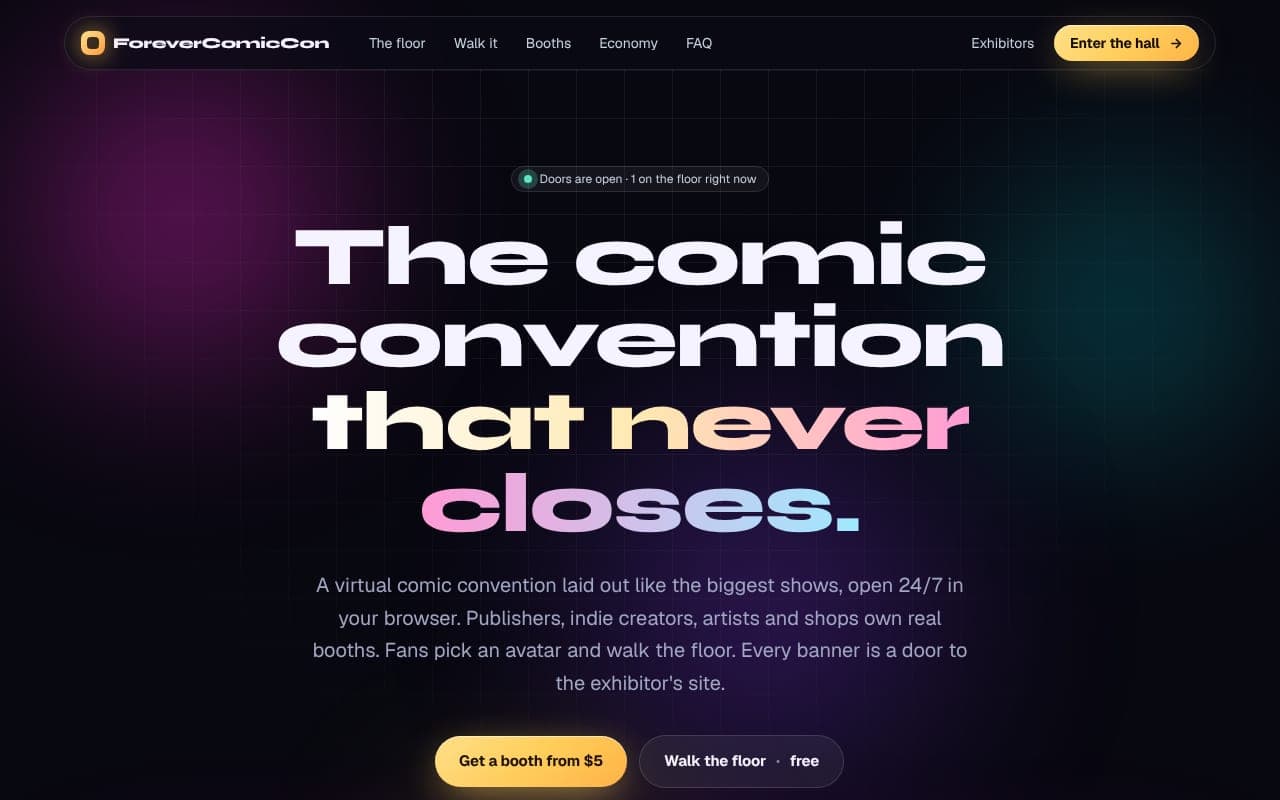
The home page. The yellow button starts the claim. 💡 You do not need an account to look around or to set up your booth. You are asked to sign in only at the very end, when it is time to pay.
Step 2: Pick a space
A panel called Get a booth opens on the left of the hall. At the top are four size buttons with prices. An Artists' Alley table ($5) is the cheapest way in. A 10×10 booth (from $10) gets a back wall, a wide banner and four comic stands.
Below the buttons is the floor plan: grey squares are open, coloured ones are taken, and the arcade is the pink block in the middle. Under the map is a list of open spaces with their booth number, size, zone and price.
Pick whichever you can afford; you can move up later and your value comes with you. Click the space you want.
- AA table · from $5: a 6-foot Artists' Alley table at the east end. A gridwall of prints with your name across the top, a chair, and your portfolio on the wall and in a book on the table.
- 10×10 · from $10: an inline booth with a back wall, side drapes, a table, four comic stands and a roll-up banner.
- 20×10 · from $20: a corner booth, double wide with two tables and two open sides.
- 20×20 · from $50: an island, open on all four sides, with a tower sign and up to four tables.
- Spaces in Front of house cost 1.5× and in Headliner Row (around the arcade) 2×. More people walk past them.
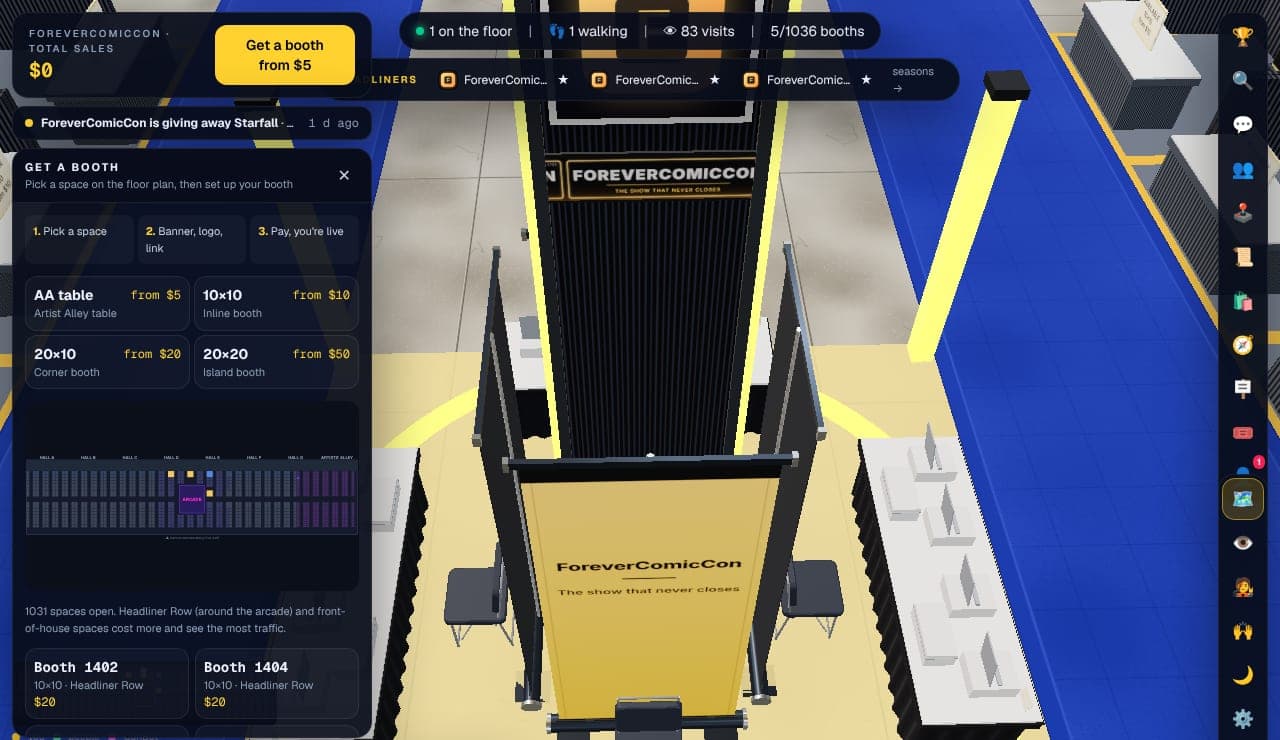
The Get a booth panel. Press a size, then click a space in the list or on the map. 💡 You can also walk the floor and click any booth with an AVAILABLE sign on its table. Its card opens with the same Set up & claim button.
Step 3: Check the space, then press Set up & claim
The card for that space shows its price, what kind of booth it is and what comes with it: a permanent booth number, a banner with your logo, tagline and link, tracked visits and clicks, and a shareable card.
Press the yellow Set up & claim this space → button.
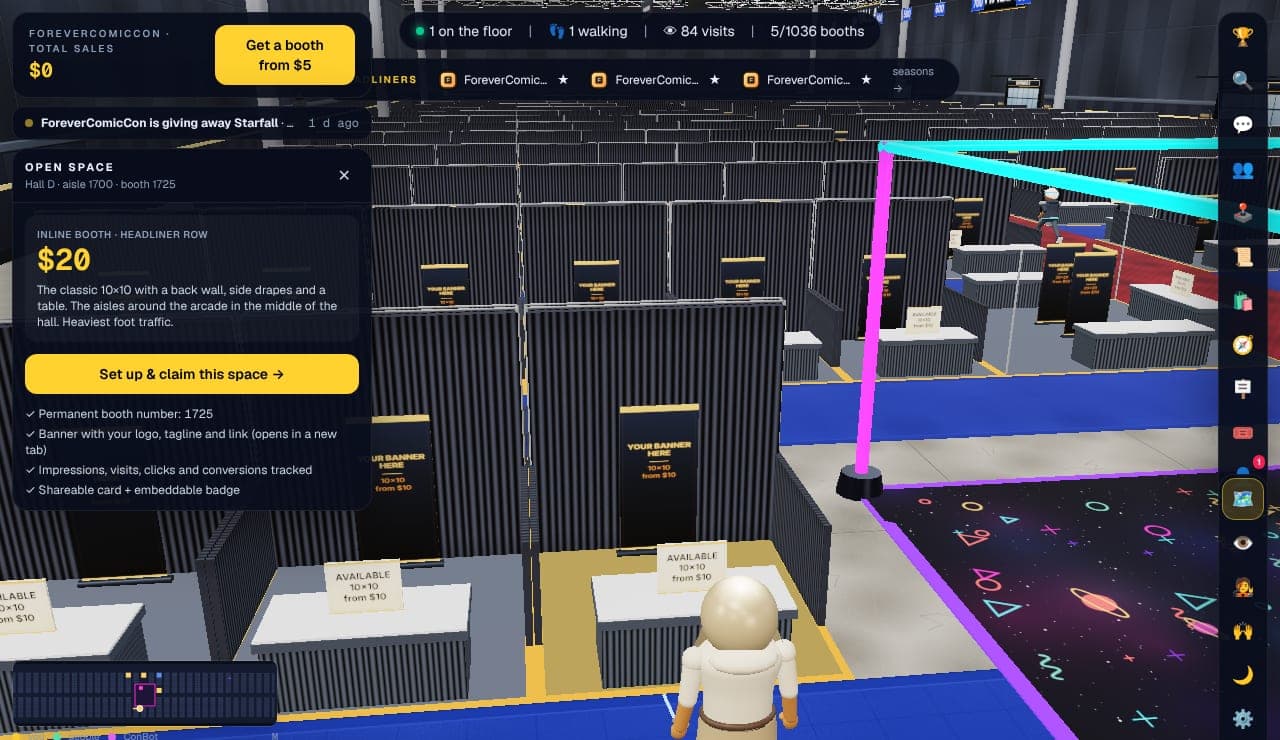
An open 10×10 in Headliner Row. The yellow button starts the setup. Step 4: Name it, point it at your campaign, colour it
The setup form opens where the card was. Everything you type shows up on the booth behind it straight away, so you can see what visitors will see.
Fill in the boxes from the top down:
- Exhibitor name: your comic's title or your studio name. Readers search by this.
- Tagline: the one line that sells the book. "A heist comic set in a flooded Venice" beats "My new comic".
- Website: the one link. During a Kickstarter, the campaign page. After it, your store or webcomic. Must start with https://.
- Logo: your title treatment or a character headshot, square.
- Banner colour and Accent: match your cover so the booth reads as the book from across the aisle.
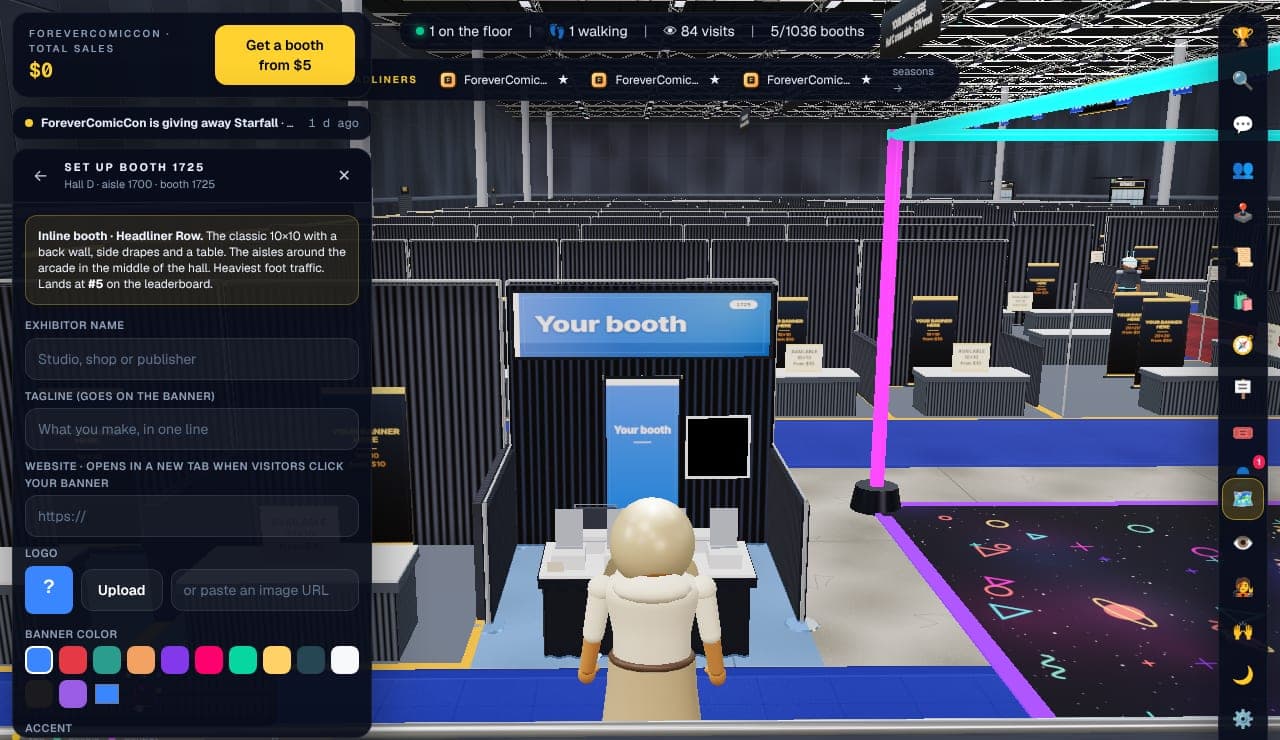
Type a name and the banner behind the form changes as you type. 💡 Every one of these can be changed later from your dashboard, for free, as often as you like. Do not agonise over it now.
Step 5: Pay and go live
Scroll the form to the bottom. The price of the space and the total are shown. If someone gave you a booth code, press Have a booth code? and type it; the total drops to $0.
Press Continue to payment →. If you are not signed in yet you are asked for an email and password first (your setup is kept). Then you are sent to the card checkout, which is run by DivinityCoin; we never see your card.
When the payment lands you come back to the hall and your booth is on the floor with your name on it. You also get an email with a link to your dashboard.
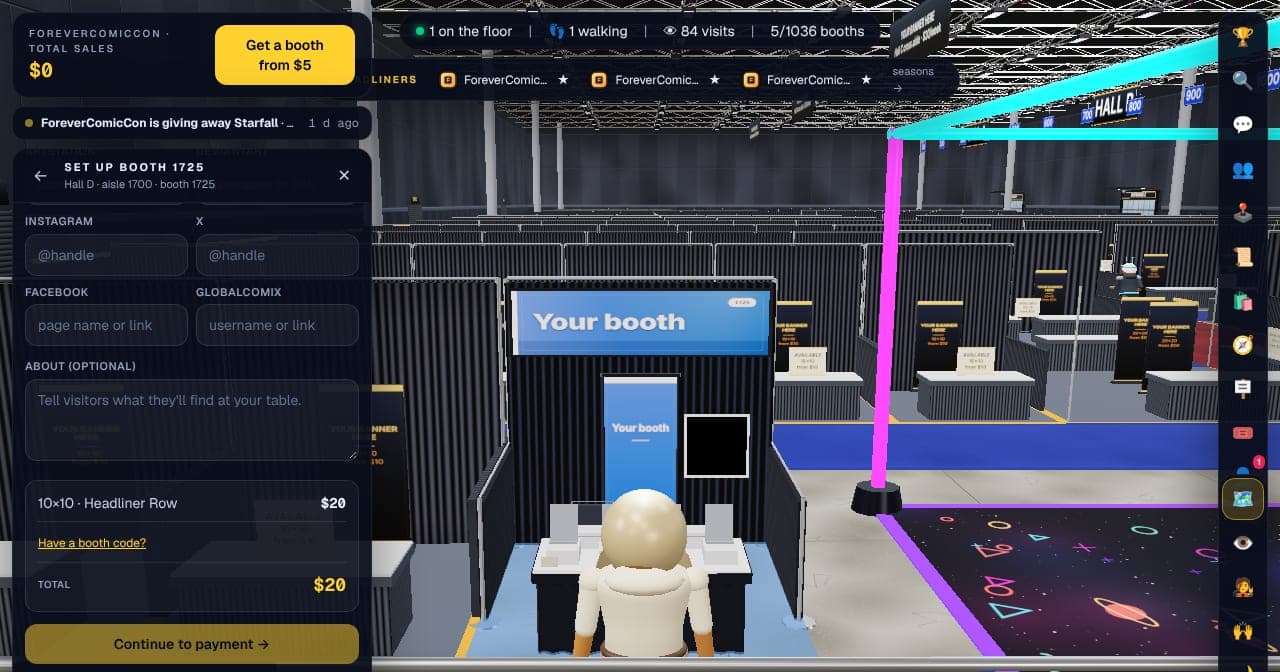
The bottom of the form: the total and the Continue to payment button. 💡 Changed your mind? A claim is refunded in full within 24 hours as long as nobody has clicked or taken over the booth yet. Rules & refunds in the footer has the details.
Step 6: Open your dashboard
Press Dashboard in the bar at the bottom of the hall, or go to forevercomiccon.com/app/dashboard. Your booths are listed on the left; click one to work on it.
The top of the page is your numbers: Impressions (people who walked past), Unique visitors, Booth visits (walked up or opened it), Website clicks, click-through rate and where the clicks came from. Switch between 7, 30 and 90 days with the buttons at the top right.
Below the numbers are the cards that change your booth. Each one is described in the next steps.
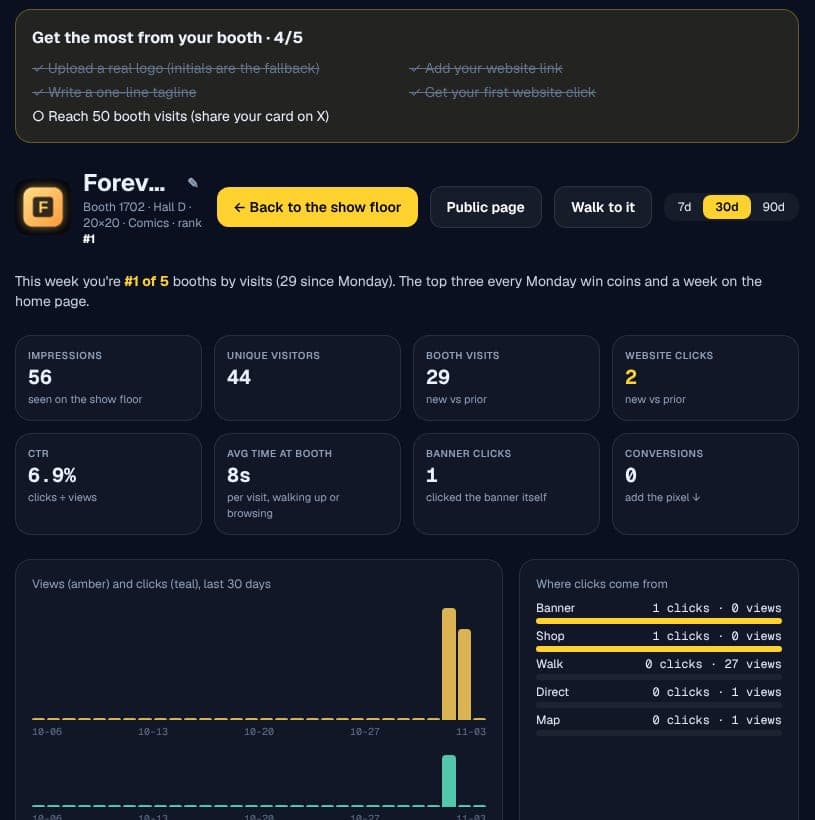
The top of a booth's dashboard. The checklist at the top walks you through the first things to do. Step 7: Put your key art on the banner
In the Banner artwork card, upload your key art to the Roll-up banner box (1200 × 2400 px, tall) and, if you have a booth, a wide version to the Wide banner box (2000 × 500 px). Press Upload, pick the file, done.
This is what people see from the aisle before they see anything else, so use the art that makes people stop, not the logo.
- Roll-up banner (1:2, 1200 × 2400 px): the tall retractable banner behind your table. The one everyone sees first.
- Wide banner (4:1, 2000 × 500 px): across your back wall, and on the header and hanging sign when you have them.
- Table drape (3:1, 1800 × 600 px): printed on the front of your table skirt.
- Islands also get a tower wrap, a floor graphic and one roll-up per side.
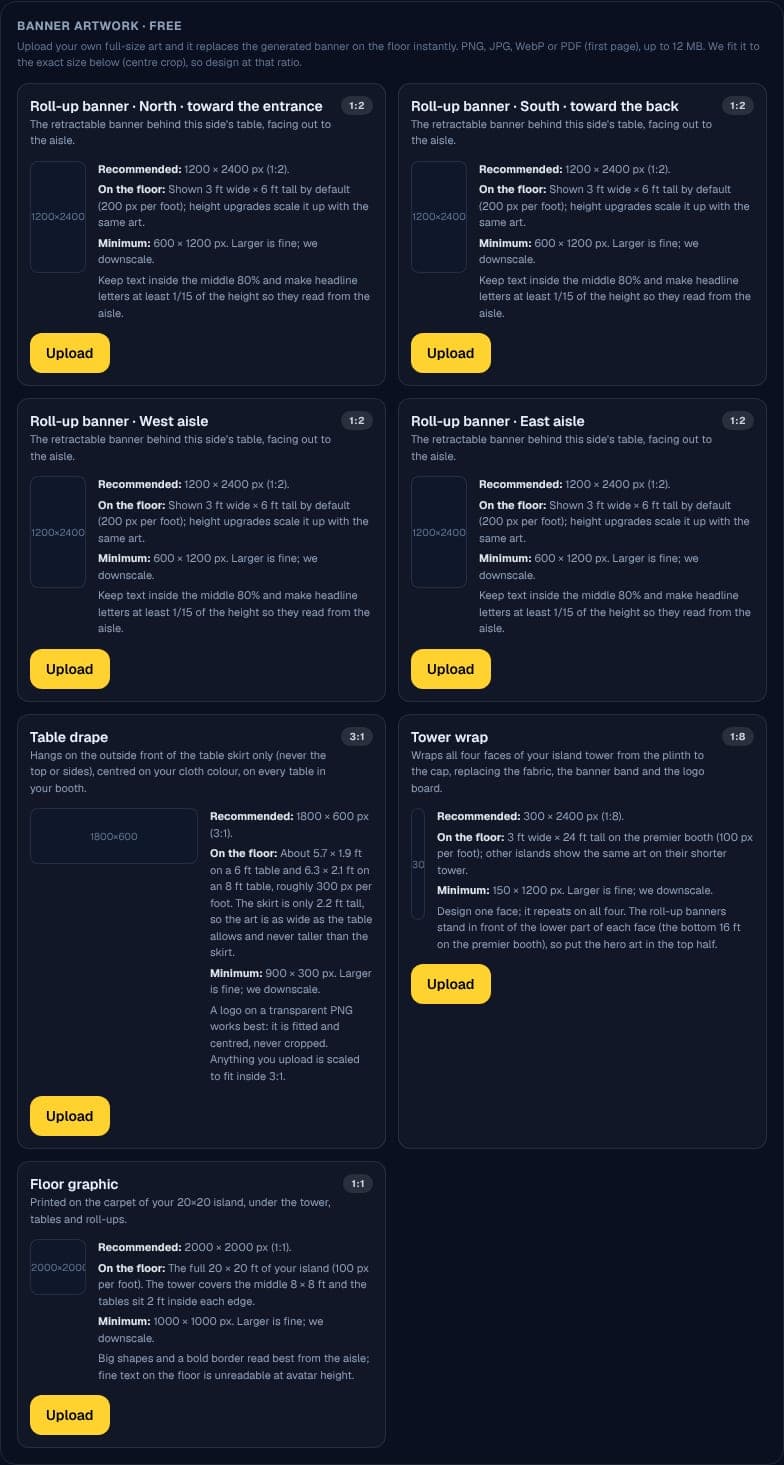
Banner artwork. Each box tells you the exact size to make. 💡 No art yet? The booth draws a banner from your name, tagline, logo and colours, so it never looks empty. Replace it when you have something.
Step 8: Stand your cover on the table with a buy link
In Books on display, press Display a book to unlock a stand ($5, once), then press Upload cover on it and pick your front cover (600 × 900 px). Paste the link to buy it in the Buy link box under the cover and press Save link.
Now the cover stands on your table in 3D. Anyone who taps it in your booth panel sees it full size, and the Buy button under it opens your link. Resting the mouse on it on the floor opens it full size too.
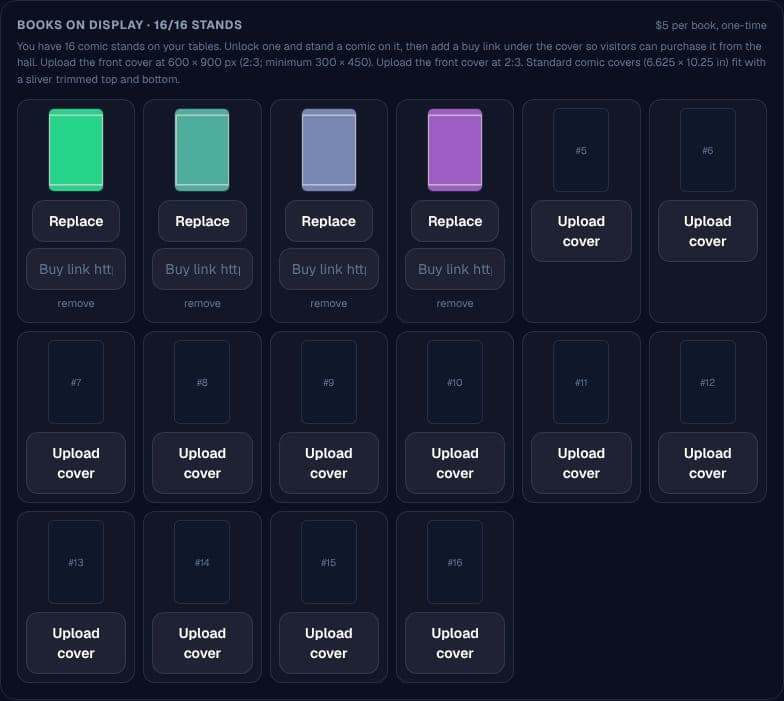
Books on display. Four covers up, twelve stands waiting. 💡 No comics to show? The On the table card just above lets you hang your portfolio on a print wall behind the table, put framed prints on the stands instead, or leave the table bare.
Step 9: Post the share card
In Share your booth, press the button for each network you use. The card is drawn from your banner art and the caption is written for you. Every link is tagged, so next week the Where clicks come from table tells you whether X, Bluesky, Reddit or Discord sent the readers.
Use the same booth link in your bio and your newsletter. It is one page that never changes.
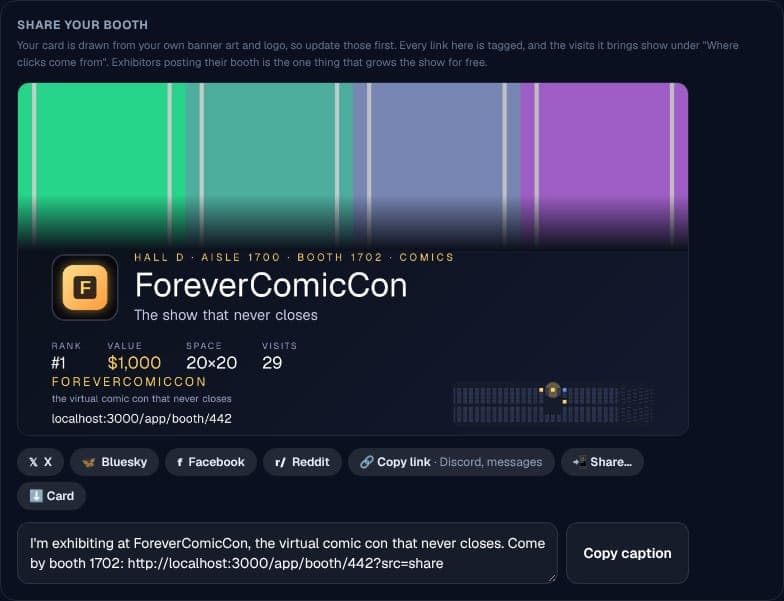
Share your booth. One press per network. Step 10: Read the numbers and adjust
The dashboard shows, day by day, how many people walked past your booth, how many stopped, how many clicked through and from where. Try a different tagline for a week. Swap the banner art. Watch the click-through rate move. Keep what works.
The same dashboard a week later: the chart fills in day by day. Step 11: Launching a Kickstarter? Swap the link, then swap it back
On launch day open Edit booth, change Website to the campaign page and press Save. Every banner click and every Buy press on your cover now goes to the campaign. When it ends, change it back to your store. The dashboard shows exactly how many people the con sent to the campaign.
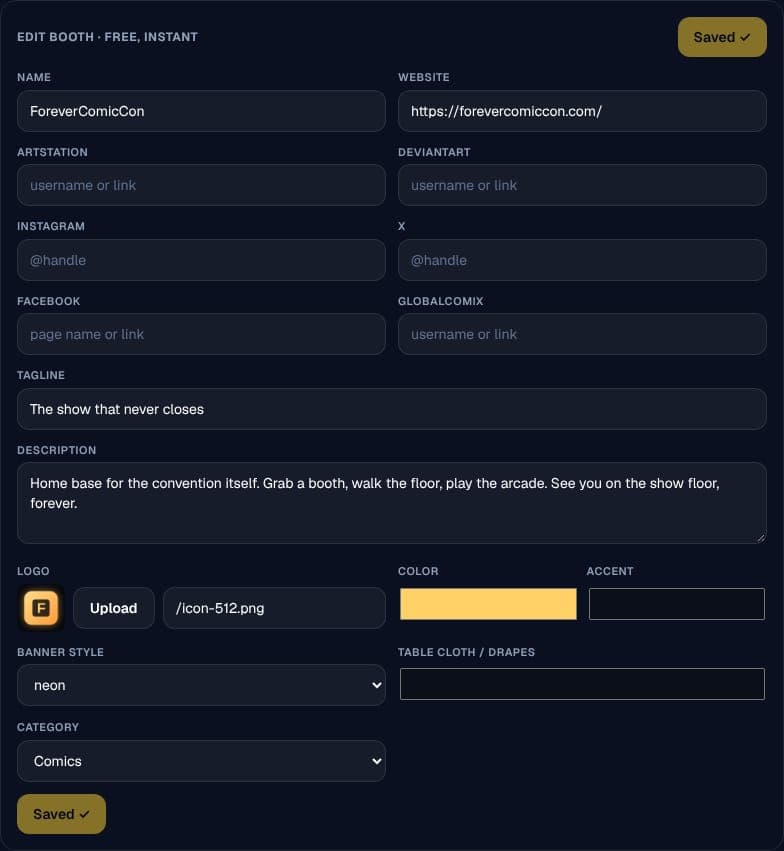
Edit booth: change the Website box and press Save. Instant. 💡 Stuck at any point? Press the ❓ button at the bottom of the bar on the right of the hall. It opens the Help panel, which has every control and every feature. The same pages are at forevercomiccon.com/help.
Every control, key, panel, price and limit is written up in the help pages, and the same pages open inside the hall from the ❓ button.
Why a booth beats another post
A post lasts a few hours. A booth sits on the floor plan every day, in an aisle people walk on purpose. Visitors here came to find comics, so every person who stops at your banner is already a reader.
- Your cover art on a banner and on the table, where browsers see it first.
- One click to your webcomic, store, Kickstarter, Patreon or newsletter.
- A booth page with a share card, so every launch post links back to the same place.
- Rankings and weekly seasons that reward the booths readers actually visit.
Know what's working
Every booth tracks impressions, visitors, clicks and referrers. Change your banner, tagline or link and you'll see whether more people stop and click, day by day. That's something you can't measure at a physical con table.
Made for small budgets
Start with an Artist Alley table for $5 or a 10×10 booth from $10. There are no ad auctions and no cost per click. If someone takes over your booth you're paid back with a profit, and you can move somewhere new.
Questions
How do I promote my indie comic online?
Be where readers browse. A booth at ForeverComicCon puts your cover and link in a 3D comic con hall that's open 24/7, and shows you how many people saw it and clicked.
Does this work for webcomics?
Yes. Link your booth to your webcomic's site, Webtoon, Tapas or Patreon page. Many exhibitors are webcomic creators.
How much does it cost?
$5 for an Artist Alley table or from $10 for a booth, plus $5 per comic stand if you want covers on the table. There are no ads to buy and no per-click fees.
Will I see results?
Your dashboard shows impressions, visitors, clicks, click-through rate and referrers by day, so you can see what your booth sends you and adjust it.
I only have a cover and a link. Is that enough?
Yes. Name, tagline, link and one cover make a complete booth. Everything else can be added whenever you have it.
The doors are open.
Walking the floor is free. Booths start at five dollars.